August 30, 2011

~First Day(s) of School~

Coming tomorrow, stay tuned....I promise to have some pictures of my two school boys! I just need to get some sleep right now...until tomorrow.

Wow, tomorrow turned into almost a month! Sorry!

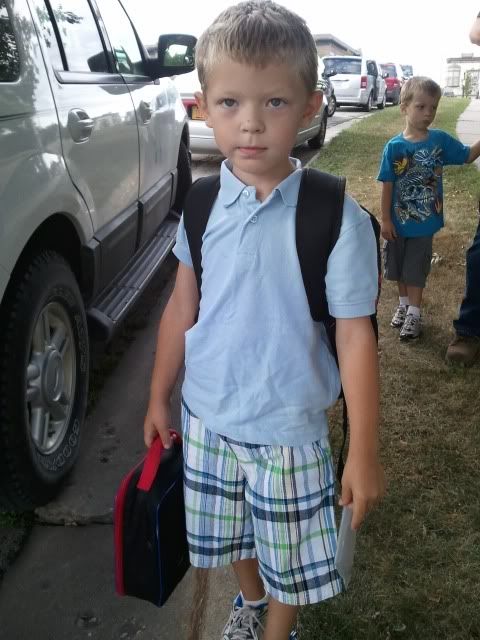
Well, Landon started kindergarten this year and so far is loving it! He rides the bus, gets up bright and early to get on by 7:20 in the morning and is doing great. He comes home a bit tired and sometimes (getting better), quite crabby. Going to school five days, all day is an adjustment! He seems to really enjoy school, learning, and of course playing with friends. He is doing Jolly Phonics and is so excited about learning to read. On his own, he loves practicing his writing letters and is now more interested in writing words. I hope his love for learning and discovering just continues to grow as he does!


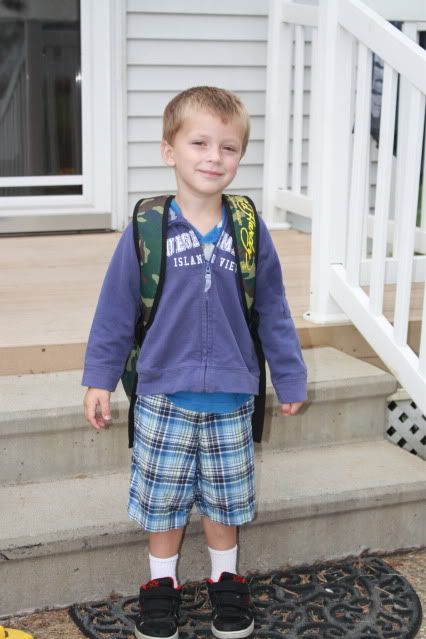
Another first in the Kuennen house, Trevor's first day of preschool! I though Trevor was going to be tough, as in crying and not wanting to go to school. Turns out I was completely 100% wrong, and he just loves it! He is only going two mornings a week, with other kids that are three and four, so as far as an adjustment it really hasn't been a problem and is just fitting into our weekly routine nicely. He gets so excited about school the night before and then when I pick him up, he is still excited and fills me in on all of the fun things that he did that day.

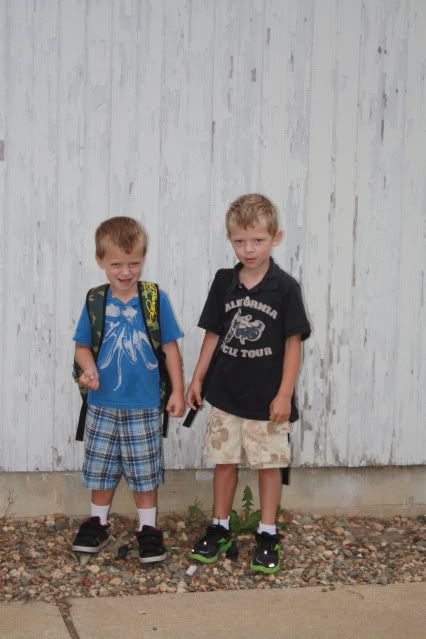
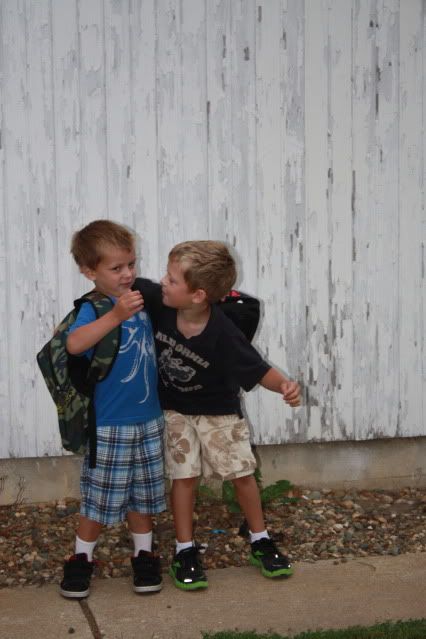
I am so proud of my two school boys! I can't believe that next year at this time I will have 3 in school, that just seems so unreal!

Waiting for the bus:

August 29, 2011

~Creation~

"In the beginning God created the heavens and the earth." 
Genesis 1:1

Trevor wants to learn about how God created the world, so with the help of some websites that I will mention and link, and a little creativity I am helping Trevor make a book. We started today, and each day we are focusing on what God created on that day. I gave Trevor his book this morning and it was completely blank. I told him how we would fill the book up one day at a time, as we learned about God. He was and is super excited! We did a five minute or so lesson (that I found at Sunday School Fun Zone, if you scroll down to Lesson: God Made the Beautiful World! you will see a great, interactive lesson on what God created each day. I omitted Bubbles the Bear) and then created his first pages in his book.

And God said, "Let there be light," and there was light. And God saw that the light was good. God called the light Day, and the darkness he called Night.
Genesis 1:3-5

I drew two triangles, and then told Trevor to color one DARK and one LIGHT. He used black for the dark and yellow for the light. After he had them colored he got to cut them out and glue them on. I had already cut out a number 1 (I got the creation numbers at www.ABCJesusLovesMe.com) and traced around it onto his book. Trevor them glued it and he had to match it up as best as he could, turns out those sticker books have been paying off because he lined it up perfect!
and his folder to keep his book and other activity papers in

~The Deck~

Check out our (almost) finished deck! I got out my notebook, almost two years ago, and drew out a deck that I wanted to add to our existing porch on the front of our house. I showed Ted, ripped it out, and pinned it to our bulletin board. There it sat. Finally, this spring Ted promised me he would build my deck! Woot woot!! He said as soon as he was done planting he would start. Planting came and went. He said as soon as he was done spraying he would start the deck. Spraying came and went, still not even a glint of maybe starting the deck, because after planting, and after spraying, there is haying. Finally, I let him know that the deck would be done before the baby was here. Meaning if he wasn't going to do it, I was going to hire someone to build it for me. That put a little pep in his step and we made the trip to purchase all of the materials, to the tune of four grand. Yikes, but it would have been MUCH more had I hired someone else to build it.

The deck building was underway, and I was so so SO excited! It was slow at first, but I knew it would be. Getting someone out to mark gas lines and such, then laying out where to put posts, digging the holes (thank goodness for the drill on the skid loader to get this job done fast!), setting the posts, basically getting the foundation of the deck ready to go. Once this was done, and with help from Ted's dad, the deck took on a form and it really went fast. I didn't just sit back and take pictures, I like to get my hands on the tools and help out where I can. I spent one afternoon with the boys screwing down most of the deck boards.

After the floor was in place, Ted got busy on the railing. I took a girls weekend trip and came back to it almost  completed, with most of the railing in place and a beautiful deck to enjoy the rest of the summer and fall on! Still left on the deck is a couple of sections of railing and the railing for the stairs. Thank you, Ted, for the GREAT deck you built me!


August 24, 2011

~A New Recipe~


Despite my lack of posting recipes, I swear I have still been in the kitchen! Our garden was not awesome this year, boo! Cold spring, mixed with a dry, hot summer made for a sorry looking garden. That and the deer found it this year, almost 4 years we have been at this house and the deer left my garden alone. This year, not so much. Even though it was not the best growing year for most of my vegetables, we are having a really good year with our tomatoes. I managed to can 5 pints of salsa this week and hope to do another 5 by the end of the week. I also did good with my basil, it was slow and then took off.

Today for lunch I had a fresh tomato from the garden, with basil from the garden, and fresh locally made mozzarella cheese. Sliced up the tomatoes and cheese, tossed on the basil leaves, drizzled with some EVOO, a little fresh ground salt and pepper, and yummo! It's hard to beat such a simple, fresh, summery treat. For super tonight we grilled some steak, ran out of gas, had to go get more, then grilled some steak. In the meantime, I put together a really great salad. Did I mention my red cabbage also did excellent this year? And that our apples are just starting to get really yummy (and we have a plethora, if you are in the area please come pick some!). I have been craving this great slaw salad, and was excited to be able to use our own cabbage and apples, and then I picked up some locally grown arugula for it as well. If you love red cabbage, like I do, you will love this recipe!

Nutty Apple-Cherry Slaw
4 cups shredded red cabbage
2 cups loosely packed fresh arugula (or watercress, baby spinach, mesclun, etc)
1 medium apple (tart, firm apple), sliced thin or chopped
1/2 cup dried cherries (dried cranberries, currants or raisins work also)
2 TB thin sliced green onion (I left this out, didn't feel like having onion breath)
1/3 cup pumpkin seeds (also good with pecans or walnuts, or a mixture of nuts)
Vinaigrette:
1/3 cup vegetable oil
3 Tb cider or white wine vinegar
3 Tb orange juice
1 Tb honey
1 1/2 tsp dijon or coarse ground mustard
1/4 tsp salt
dash of cinnamon or nutmeg
Mix well (I have an awesome dressing maker by pampered chef), or use a jar with a lid and shake until well combined.

Mix all of the ingredients together in a large bowl, toss with the vinaigrette. You can serve this immediately or put it in the fridge for later.

August 21, 2011

~Mail Organizer~

This has been on my "to do" list for a very long time. There really was not very much sewing on this project, it was mostly glueing and stapling. Yesterday I was looking for something to do, something besides the laundry, dishes, and mess of playdoo to clean up. The mail organizer popped in my head, so I headed out to the barn and found a piece of scrap wood, picked out three different fabrics and got to work. I did somewhat follow this tutorial from the blog noodlehead , but mostly just was winging it. Mine is bigger than the tutorial, and I didn't do the slots exactly the same. Overall it is not perfect, but at least now I finally have my mail organizer and hopefully that means the mail will stop piling up on my kitchen counters!

~Diaper Bag~

I haven't sewn a diaper bag in a while. Well, I take that back, I do have two diaper bags that I am half way done with. I guess better wording would be, I haven't finished a diaper bag in a while! I was recently contacted to make a diaper bag for a super nice mama, that is due with baby number two very soon. She has a son and doesn't know what the next will be, so she was going for something a little more gender neutral. I don't have a lot of "diaper bag material" on hand so after a few searches online, she and I were able to narrow down the choices and finally came up with such a cute combination of fabric. I just love how this bag turned out!

~iPhone Case~

This was such a fun quick sewing project. I was asked if I could make this, and of course I said yes. I love doing custom orders! No step by on this project, but if you want to make your own just google iphone case tutorial or something of the sort. If you want to buy one, hit me up or head over to etsy.com and search iphone case:) I think I need to make one for my android!

August 20, 2011

~31 weeks~

Single digit weeks to go, folks! I am doing pretty good, my ulcerative colitis is flaring very bad right now. Baby is doing great, though. She is measuring a week ahead, getting the hiccups like crazy, and moving all around (not nearly as much as her brothers did, but still a lot). I passed my gestational diabetes test...without having to take the 3 hour test, woohoo!!! And have now graduated to appointments every 2 weeks, which means these finally weeks are going to FLY by.

I have been doing more nesting (trying to get ride of lots of the boys' toys, their big things mostly, but Ted wouldn't let me), rearranging furniture in the basement, organizing my sewing/crafting area, as well as getting baby girl's "nursery" more ready. I say "nursery" because it really is just the corner of our bedroom. We have a great house and an even better location where our house is, BUT we only have two bedrooms....that's right, soon to be family of six is nice and cozy bunking up in two bedrooms. Ideally, if the entire upstairs was just one huge room it would be perfect. We 100% have a family bed, meaning most mornings I wake up there are at least 4 of us if not all 5 in my bed. Anyway, back to the "nursery". The crib has been up since Father's Day, for some reason Ted just decided to put it up (pretty sure he was very excited about having a daughter!). I added some vinyl wall art recently, put together the changing table and hung a shelf yesterday, and am in the process of organizing her clothes because as of right now I have everything out from newborn to 2t. My grandma gave me some really GREAT stuff to add to the "getting ready for a girl" fun. She gave me crib bedding, a Juicy diaper bag, some cute storage totes, the shelf that I hung, a BEAUTIFUL moses basket, oh so soft and pretty blanket, hooded towels, and of course some adorable outfits....THANKS Grandma! It is starting to look like a baby is about to be here!!!


August 19, 2011

~Finally~

A new blog entry! I have so much I want to blog about and hope I can get some entries in in the next few days ranging from our new deck, first day of school, sharing some sewing projects I have finished, a fun trip I just got back from, and a 31 week belly picture (which I am today!). This blog entry is also about finishing something...my dinning room chairs. Anyone remember that I had mentioned I just got the fabric to recover my chairs?? Yeah, it was a while back and I actually did four of the chairs right away and realized that because it was a directional pattern I was going to need twice as much fabric. I ordered more fabric and it came and has been just sitting for a while in my pile of "PLEASE FINISH ME" things. Today was the day that I just finished them. It's not hard, doesn't take a lot of time, and is instantly rewarding. Not sure why I put it off, but at least now I can say it is done! Oh, and I remembered to take some pictures along the way. Really I could just explain it but I am a visual person and would rather look at a picture:).

All I did was take the cushions off of the chairs (4 screws, would have been much easier if I could have found the right bit for the power drill but doing it by hand worked). Set the cushion on the fabric and eyeballed it, then cut the fabric, stapled it on (with a heavy duty stapler), put the cushion back on and screwed it back into place. Done!

Before and After:
Keep in mind this is one of the "clean" cushions.
This was some great indoor/outdoor fabric that is also stain resistant and water repellant...um, translation: "perfect fabric for a chair in a family of 3 young, MESS prone boys!"

And some step by step (kind of):
Cut fabric, again I just eyeballed it.
Staple one side, then staple the opposite side pulling tight as you staple.
Do the same for the other two sides, leaving all 4 corners for the end.
Staple all four corners nice and tight.
Trim the extra fabric.
There you have it, screw it back on to the chair and finished!